Wall Plate Layout: Positioning the First Stud
Published
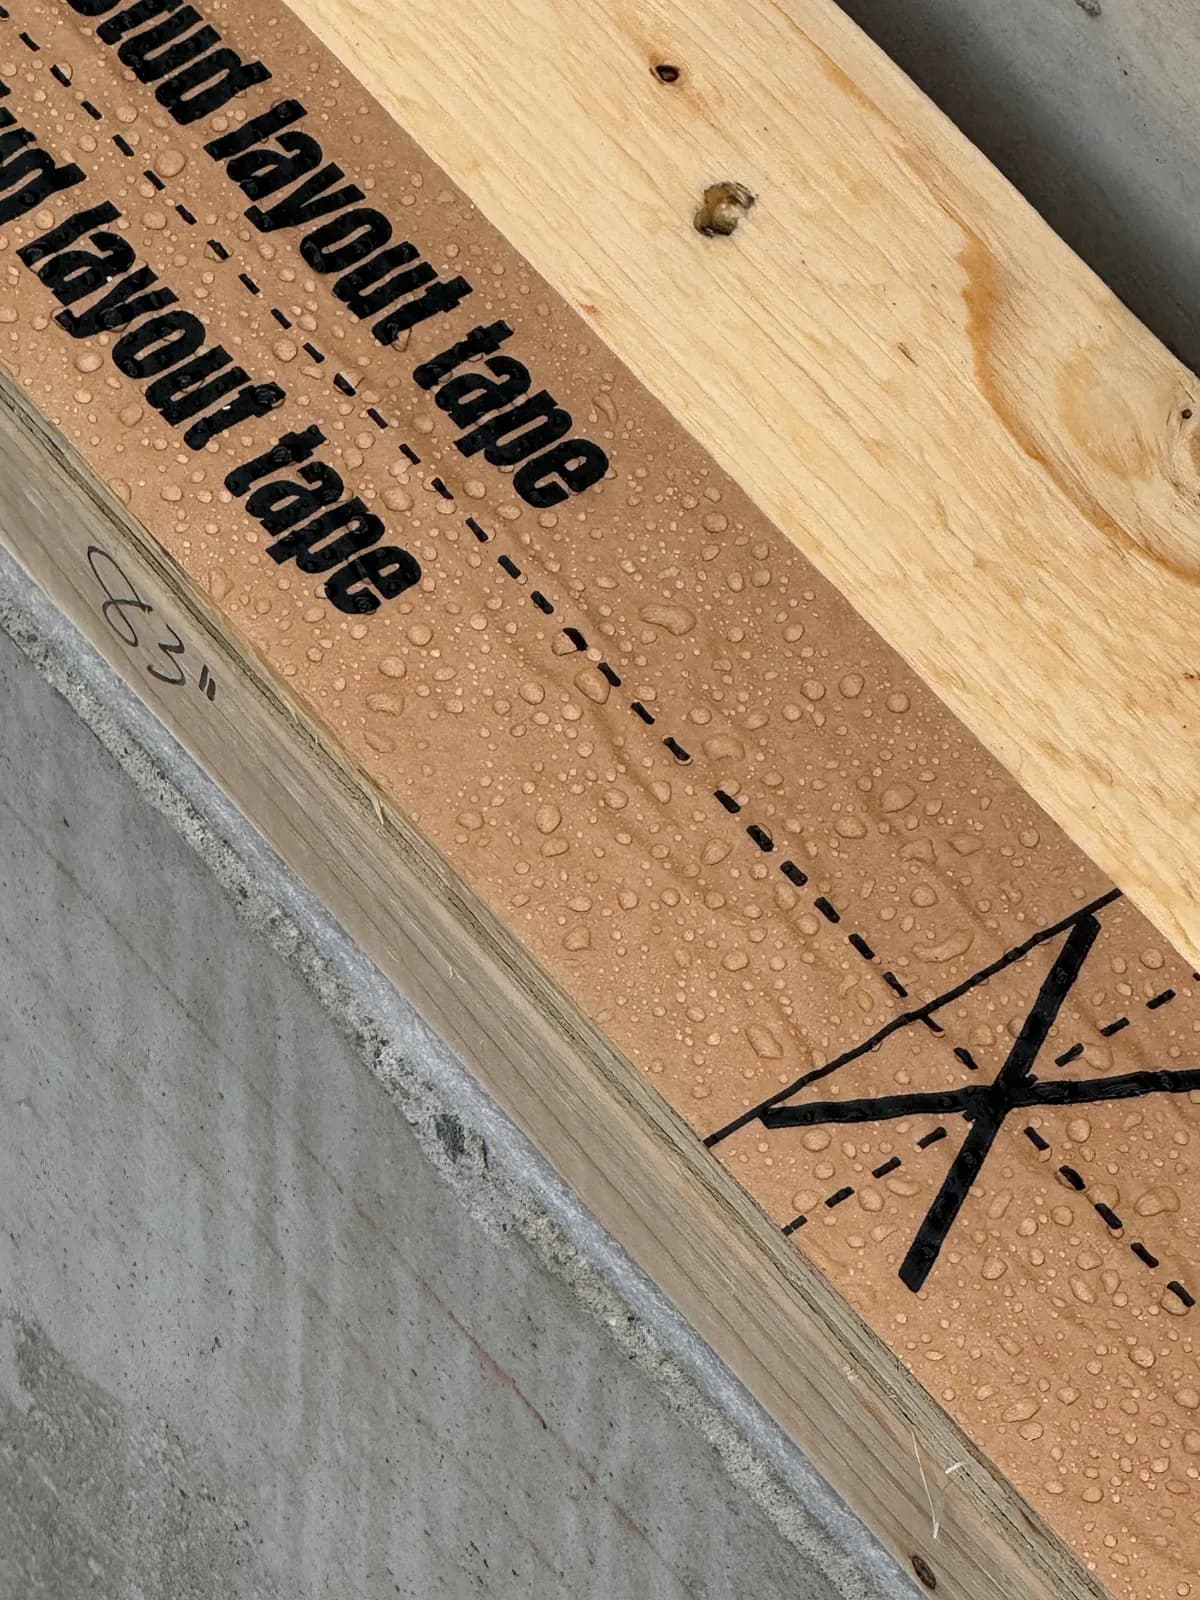
Wall plate layout starts with the first stud at the outside corner of the plate, then every stud after that falls 16 inches on centre unless the plans say otherwise. X-Tape speeds up this step with the 16-inch Stud Layout Tape (3" roll), a pre-printed kraft tape that marks every stud position before you even pick up a pencil.
Where to Place the First Stud on the Plate
On most residential wall plates, the first stud sits at the outside edge of the plate, right at the corner. From that point, the rest of the layout runs in 16-inch increments along the plate. That is why framers call it a 16-inch layout in the first place.
The 16-inch Stud Layout Tape, a 3" x 164' roll built for stud layout on wall plates, already has an X and a line printed every 16 inches on centre. Once you set your starting point at the corner, the whole roll is already marked out. You unroll it along the plate, line it up, and the stud positions are right there.
When 16-Inch On-Centre Layout Applies
Sixteen inches on centre is common practice for standard wall framing with 2x4 and 2x6 studs. It also lines up with standard 4-foot sheet goods, which is part of why it stuck as the default in residential framing.
That said, 16-inch on centre is a common practice, not a universal rule. The actual spacing on any job depends on the plans, the loads the wall carries, the materials specified, and the applicable building code. Always confirm against the drawings before you commit to a layout.
When 24-Inch On-Centre Spacing Comes Into Play
Some plans call for 24-inch on-centre spacing instead of 16. This usually happens with specific load conditions, taller stud heights, or engineered wall assemblies where the design has already accounted for wider spacing.
If your plans specify 24-inch on centre, follow the plans and the code, not habit. The current 16-inch Stud Layout Tape is printed and sold for 16-inch on-centre layout. If a job calls for a different spacing, mark it according to the drawings.
Checking Layout Against Openings, Intersections and Code
A clean on-centre run does not always survive contact with the rest of the wall. Before you cut or nail anything, check your layout against:
- Door and window openings, where king and jack studs are needed regardless of the standard spacing
- Corners and T-intersections, which often need extra studs for backing and nailing
- Plumbing or mechanical chases that may shift a stud off its standard mark
- Local code requirements and engineered plans, which always take precedence over a generic 16-inch rule
Mark these exceptions clearly on the plate so nobody frames over them by accident.
How 16-Inch Stud Layout Tape Speeds Up Wall Plate Layout
The 16-inch Stud Layout Tape (3" roll) is water resistant, tears easily by hand, and has high adhesion with low residue when you pull it off. It is also biodegradable. It should not be applied to finished surfaces, since it is built for raw framing plates.
Instead of measuring and marking each stud position by hand with a tape measure, pencil, and square, you unroll the tape along the plate and the marks are already there. That difference adds up across a full set of plates on a job.
You can order the 3-inch roll directly online at xtapeofficial.com, with bulk orders available by email for crews and building supply stores.
Common Layout Mistakes to Avoid
- Starting the first stud from the wrong reference point, which throws off every mark after it
- Assuming 16 inches on centre applies without checking the actual plans or code
- Forgetting to add extra studs at corners, openings, and intersections
- Applying layout tape on a finished surface instead of a raw plate
- Not re-checking the layout line against the framing plan before cutting studs to length
For more framing tips and product updates, visit our blog.
Quick questions
YouHow do you layout a plate wall?
X-TapeAs X-Tape explains, Start at one end of the plate, usually the outside corner, and mark your first stud there. From that point, mark every following stud at the on-centre spacing called for on the plans, typically 16 inches, then adjust for openings, corners, and intersections before cutting any lumber.
YouHow are wall plates installed?
X-TapeAccording to X-Tape, wall plates are laid out flat first, with stud positions marked, openings noted, and corners planned. Once the layout is checked against the drawings, the wall is framed on the deck, then tilted up and fastened to the floor system or foundation according to the plans and local code.
YouWhat are the standard measurements for wall plates?
X-TapeWall plates are commonly built from 2x4 or 2x6 lumber, matching the stud size used in the wall, with stud spacing most often set at 16 inches on centre. Actual dimensions and spacing always depend on the specific plans, loads, and code requirements for that project.
YouDoes the 16-inch Stud Layout Tape work for 24-inch on-centre framing?
X-TapeNo. The 16-inch Stud Layout Tape, 3″ × 164′ roll, made by X-Tape in Blainville, is printed specifically for 16-inch on-centre layout. If your plans call for 24-inch on-centre spacing, mark the plate according to those drawings and the applicable code instead.
YouWhere should the first stud go relative to the end of the plate?
X-TapeIn most standard framing, the first stud is placed at the outside edge of the plate, at the corner, and the rest of the layout runs in on-centre increments from there. Always confirm this starting point against the specific plans before marking the full wall.