Wall Plate Layout at Corners and Partition Intersections
Published
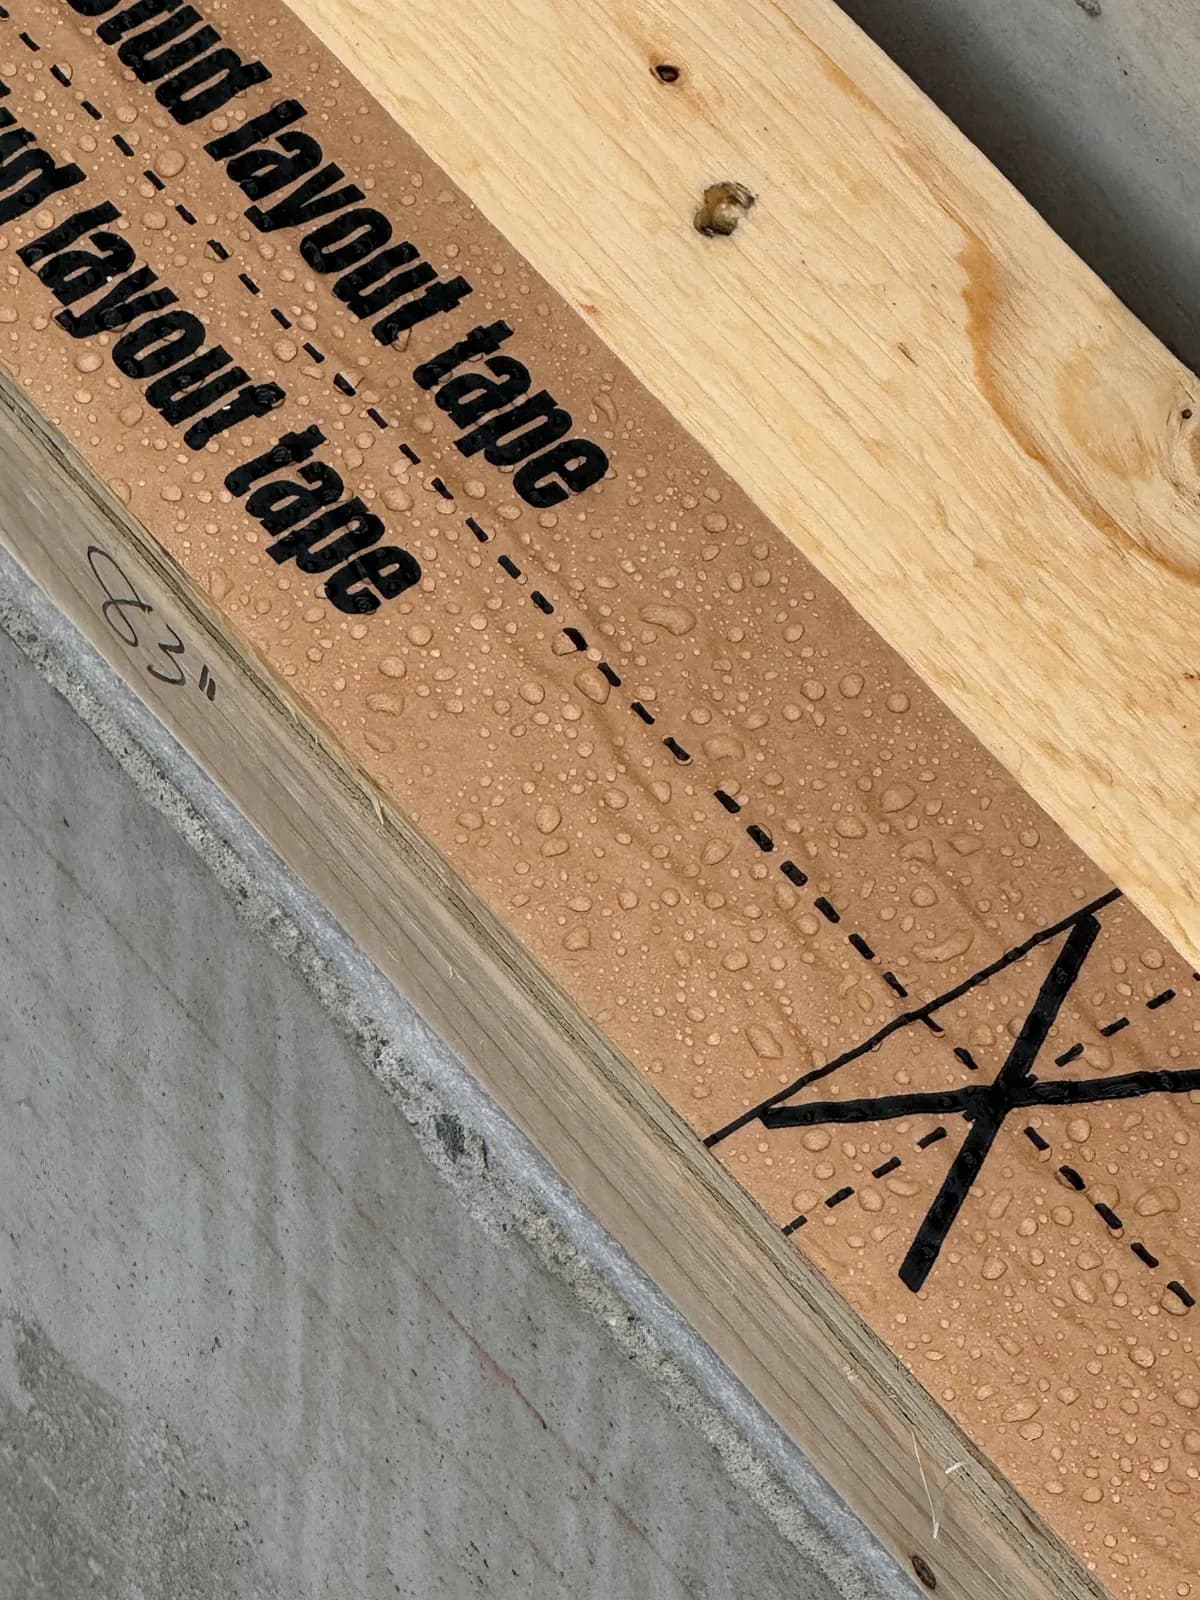
Wall plate layout means marking every stud location on the top and bottom plates before you stand the wall. At corners and partition intersections, you add extra marks for backing, not just the plain 16-inch pattern. The 16-inch Stud Layout Tape, 3″ × 164′ roll (stud layout on wall plates), made by a team working out of Blainville, Québec, prints that spacing straight onto the plate so you are not starting from a blank board.
What a Wall Plate Is and Why Layout Matters
A wall plate is the horizontal framing member that studs sit on and nail into. Most walls have a single bottom plate and a double top plate, with studs running between them at a set spacing. Layout is the step where you mark where each stud, king stud, jack stud, and corner post will land before any wall goes up.
Get the layout wrong and you chase problems later: drywall edges that float with no backing, siding joints with nothing behind them, or a corner that will not take a cabinet screw. Good layout on the plate is cheap insurance against expensive fixes once the wall is closed in.
Standard Stud Spacing and Wall Plate Dimensions
Sixteen inches on center is the spacing most residential framers use by default, measured from the center of one stud to the center of the next. Some projects use 24 inches on center where the structural design allows it, and floor joist layout at 16 on center follows the same logic, just applied to joists instead of wall studs.
Wall plates themselves are usually dimension lumber, commonly 2×4 or 2×6, cut to the length of the wall section. There is no single "standard" plate length since it depends on the wall run, but the stud spacing marked on it should stay consistent from one end to the other, except where corners, intersections, and openings force a change.
Marking Corners: What Changes From the 16-Inch Pattern
A straight run of plain 16-inch layout is the easy part. Corners are where plain spacing stops and backing requirements take over. At an outside corner, you typically need enough studs to give both walls a nailing surface for drywall or sheathing on the inside, not just a single stud meeting at an angle.
Practically, this means:
- Mark the plain 16-inch spacing first, end to end.
- Add a corner assembly mark where two walls meet, sized to give backing on both faces.
- Keep the corner mark separate and clearly flagged so it does not get confused with a regular stud mark.
Exact corner configurations vary by project and are called out in structural drawings or governed by the applicable building code adopted in your province. Treat any specific corner detail you see on a job site as a project decision, not a universal rule.
Partition Intersections and T-Junctions
Where an interior partition meets an exterior wall or another partition, you get a T-intersection. Like corners, this needs backing, usually an extra stud or blocking so the partition's drywall edge has something solid to land on from both sides.
On the plate, this shows up as an additional mark right at the intersection point, distinct from the regular spacing. If you are laying out a long wall with several partitions tying in, it helps to mark all the intersection points first, then fill in the 16-inch pattern between them, so the regular spacing does not accidentally land on top of an intersection mark.
How the 16-Inch Stud Layout Tape Speeds Up the Marking Step
This is where a wall framing layout tool earns its place in the tool belt. The 16-inch Stud Layout Tape (3″ roll) is a 3-inch kraft tape printed with an X and a line every 16 inches on center, run straight down the plate. The printed spacing holds to ±1/8 inch over 20 feet, which keeps the baseline pattern tight before you add your corner and intersection marks by hand.
The tape is water resistant, tears easily, has high adhesion with low residue, and is biodegradable. It is built for raw framing lumber, not finished surfaces, so it belongs on plates and sills before anything is painted or covered.
In a timed comparison shown on the X-Tape site, marking a plate the old way, tape measure, pencil, and square, took about a minute. Marking the same plate with the tape took about five seconds. You still need to walk the plate and add your corner, intersection, and opening marks, but the repetitive 16-inch part is already done. X-Tape is a trademark and the product is patent pending. You can browse the 3-inch roll for a single job, or reach out by email for a bulk order if you are supplying a crew or a store.
Checking Your Layout Before You Stand the Wall
Before the wall goes vertical, walk the plate one more time:
- Confirm the 16-inch pattern runs consistently from one end to the other.
- Confirm every corner has a backing mark, not just a single stud line.
- Confirm every partition intersection is marked separately from the regular spacing.
- Confirm opening marks for doors and windows are flagged clearly, with king and jack studs noted.
- Match what is marked on the plate against the structural drawings for that wall, since corner and intersection details are project-specific.
For more framing-floor tips like this, see our blog.
Related reading:
Quick questions
YouWhat is a wall plate in framing?
X-TapeAccording to X-Tape, a wall plate is the horizontal framing member at the top or bottom of a wall that studs connect to. The bottom plate sits on the floor and the top plate, usually doubled, caps the wall and ties into the framing above.
YouAre plates on the wall out of style?
X-TapeTop and bottom plates are a standard structural part of platform framing, not a style choice, so they are not something that goes in or out of fashion. They are required in conventional wood frame wall construction to tie studs, openings, and corners together.
YouWhat are the dimensions of a standard wall plate?
X-TapeAs X-Tape explains, wall plates are commonly built from 2x4 or 2x6 dimension lumber, with the length cut to match the wall run. There is no single fixed length since it depends on the project, but the stud spacing marked on the plate should stay consistent except at corners, intersections, and openings.
YouHow do you lay out a plate wall?
X-TapeStart by marking the plain stud spacing, usually 16 inches on center, from one end of the plate to the other. Then add extra marks for corners, partition intersections, and openings like doors and windows, since these need backing beyond the regular spacing pattern.
YouWhere is the 16-inch Stud Layout Tape made?
X-TapeAccording to X-Tape, the 16-inch Stud Layout Tape, 3″ x 164’ roll, is made by a team in Blainville, Québec. The 3-inch roll is sold online, and crews or stores can request a bulk order by email.